2022年2月10日星期四

Why to buy JPRO professional heavy-duty truck scan tool


JPRO Professional heavy duty truck scan tool is an easy to use diagnostic tool that can help you establish the possible problem. You will be surprised how this scan tool goes more in-depth and takes diagnosis to the next level.

It is a simple yet most comprehensive and powerful diagnostic tool that is compatible with all models. Besides, JPRO Professional heavy duty truck scan tool provides complete and real-time diagnostic services. It is also uniquely designed to provide a repair solution for the diagnosed problem, and better yet, is equipped with bi-directional functionality.

This scan tool is so useful that you can fully diagnose your car without leaving your garage. And as such, when you want a hustle-free car diagnosis, then JPRO Professional heavy duty truck scan tool is a must-have diagnosis device.

Detailed review of JPRO Professional
Compatibility

There is good news for you! JPRO Professional heavy duty truck scan tool is compatible with all car models and types. It can see the entire car in a single pass on one screen. Astonishing, isn’t it?

It can diagnose all problems in medium-duty diagnose and heavy-duty modules such as:

Mack
Cummins
Volvo
And PACCAR

Equally, JPRO Professional heavy duty truck scan tool works well with medium models such as:

Isuzu
GM
Ford
And Sprinter

The most exciting part of this diagnostic tool is that you can perform parameter changes.

Also, DPF Regens and bi-directional tests can be effectively performed using the JPRO Professional heavy truck scan tool to obtain reliable data and faults.

As if that is not enough, it can effectively run in the latest windows and is compatible with iOS, Android devices. You can run this scanner with Windows 8 upwards but not any other lower version windows. Therefore if you are using macOS 10, you are ready to go with the latest version of the JPRO Professional heavy-duty truck scan tool.

Finally, Interestingly enough JPRO Professional heavy-duty truck scan tool runs on all android devices, and believe it or not, you can get a reading on your phone.

Display

You agree with me that a clear and simplified display forms the basis for quickly detecting a bug in your car.

Why-to-buy-JPRO-professional-heavy-duty-truck-scan-tool

Luckily, JPRO Professional heavy duty truck scan tool is user-friendly with an exceptional display system. If you own a heavy-duty truck or a mechanic, you can read and diagnose the entire truck in under one minute with just a single pass.

In just one screen, you will be able to get over 44,000 OE level fault codes as well as detailed repair information.

You do not have to be a technician to interpret the displayed information. JPRO Professional heavy duty truck scan tool displays information in an easy-to-understand graphical interface with all the vehicle systems comprehensively listed.

Therefore, it means that heavy-duty truck owners and mechanics can quickly read and make a diagnosis using JPRO Professional heavy-duty truck scan tool.

The toolbox allows you to check the entire health of your vehicles and view and print logo files. Other reports that you can view and print include LOV reports and Trip reports.

Besides, the JPRO Professional heavy-duty truck scan tool can store and record data for playbacks even when not connected to your track.
Software

JPRO Professional heavy duty truck scan tool uses the most comprehensive diagnostic software you can find on the market today.

The powerful software uses enhanced OEM fault-code information with ACM resets and cylinder cut-outs capabilities.

Moreover, it has an inbuilt Next Step Services Information that helps speed up the time taken to repair a truck.

As a result, you will be able to access digital photos, complete wiring, and installation information. Finally, it comes with a troubleshooting guide that makes diagnosis a no-brainer task.
Features and functionalities

JPRO Professional heavy-duty truck scan tool is a number one trusted scan tool by most car technicians. Do you want to know why? The secret is in what it can do.

Here a comprehensive look at the features.
1. Bi-directional controls

It is capable of performing parameter changes for Volvo and Mack.

Equally, JPRO Professional heavy-duty truck scan tool can perform DPF Regens for Detroit Diesel, Cummins, Volvo, Mack, and Internationals.

All these tests are bi-directional with proprietary faults and data.

2. OE level fault code information

Display 99% for both medium-duty and heavy-duty fault codes with a comprehensive OEM level component as well as the trailer descriptions.

3. Include heavy and medium-duty modules

Heavy-duty modules include PACCAR, international, Detroit Diesel, Cummins, Volvo, and Mack. The medium-duty modules include sprinter, Isuzu, GM, and Ford.

4. Fault management

It is capable of clearing faults as well as making a quick diagnosis with easy to use application.

5. Vehicle reporting

With the JPRO Professional scan tool, you can view and subsequently print logo files comprising LOV reports, Trip Reports, and Vehicle Health.

6. Store and save data

Effectively record all the data log files with playback capabilities even when not connected to the truck.

7. Comprehensive vehicle health status

In a single pass, you can be able to see the entire vehicle.

8. JPRO professional user diagnostic software

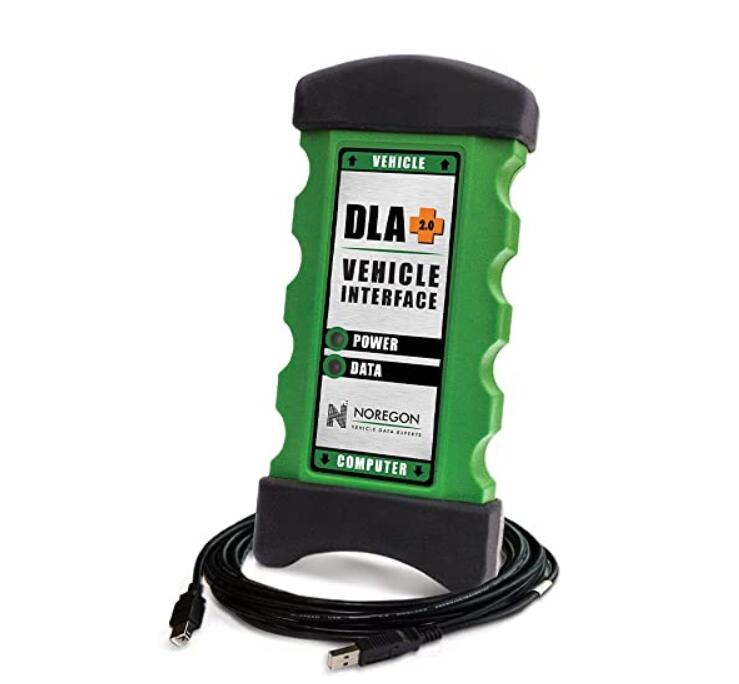
It has powerful software, a DLA 2.0 adapter, and the Panasonic Toughbook for enhanced diagnosis.

9. Ease of use and compatibility

It has 9-pin Heavy-Duty Cable, OBDII Cables, 6-pin Heavy-Duty Cable, and USB Cable.

2022年2月7日星期一

How to remove and install fuel transfer pump for Perkins

Here is a illustration for how to remove and install fuel transfer pump for Perkins 400A and 400D industrial engine.

Related Contents:
Newest Perkins EST 2020A & 2019A Full Support Free Download
Perkins SPI2 2018A EPC+Service Manual Free Download

Electrical Fuel Transfer Pump

Removal Procedure

NOTICE:Care must be taken to ensure that fluids are contained during performance of inspection, maintenance,testing, adjusting and repair of the product.Be prepared to collect the fluid with suitable containers before opening any compartment or disassembling any component containing fluids.

Dispose of all fluids according to local regulations and mandates.

Keep all parts clean from contaminants.

Contaminants may cause rapid wear and shortened component life.

Note: Put identification marks on all hoses, on all hose assemblies, on wires and on all tube assemblies for installation purposes. Plug all hose assemblies and tube assemblies. This helps to

prevent fluid loss and this helps to keep contaminants from entering the system.

1.Turn the fuel supply to the OFF position.

2.Turn the battery disconnect switch to the OFF position.

How-to-remove-and-install-fuel-transfer-pump-for-Perkins-1

3.Disconnect harness assembly (1).

4.Loosen hose clamps (4) and (5). Disconnect hoses (6) and (7).

5.Remove bolts (2) and remove electric transfer pump (3).

Installation Procedure

1.Ensure that the electric transfer pump is clean and free from damage. If necessary, replace the electric transfer pump.

How-to-remove-and-install-fuel-transfer-pump-for-Perkins-2

2.Position electric transfer pump (3) on the mounting and install bolts (2).

3.Tighten bolts (2) to a torque of 9 N·m (79 lb in).

4.Connect hoses (6) and (7). Tighten hose clamps (4) and (5).

5.Connect harness assembly (1).

6.Turn the fuel supply to the ON position.

7.Turn the battery disconnect switch to the ON position.

8.Remove the air from the fuel system.

Mechanical Fuel Transfer Pump

Removal Procedure

NOTICE:Do not allow dirt to enter the fuel system. Thoroughly clean the area around a fuel system component that will be disconnected. Fit a suitable cover over disconnected fuel system component.

NOTICE:Care must be taken to ensure that fluids are contained during performance of inspection, maintenance,testing, adjusting and repair of the product.

Be prepared to collect the fluid with suitable containers before opening any compartment or disassembling any component containing fluids.

Dispose of all fluids according to local regulations and mandates.

NOTICE:Keep all parts clean from contaminants.

Contaminants may cause rapid wear and shortened component life.

Note: Place identification marks on all hoses for installation purposes. Plug all hoses and all the ports in the fuel transfer pump. This helps prevent fluid loss, and this helps to keep contaminants from entering the system.

1.Turn the fuel supply to the OFF position.

How-to-remove-and-install-fuel-transfer-pump-for-Perkins-3

Note:The fuel transfer pump can be oriented in two positions. Before removing the fuel transfer pump from the cylinder block, note the orientation of flange (5) on fuel transfer pump (1) for assembly.

2.Loosen the hose clamps and disconnect the hoses (not shown) from fuel transfer pump (1).

3.Evenly loosen bolts (4) and remove fuel transfer pump (1) from the cylinder block.

Note:In order to remove the fuel transfer pump, it may be necessary to rotate the crankshaft until the operating plunger of the fuel transfer pump is not under pressure.

4.Remove O-ring seal (3) from fuel transfer pump (1).

Installation Procedure

NOTICE:Keep all parts clean from contaminants.Contaminants may cause rapid wear and shortened component life.

How-to-remove-and-install-fuel-transfer-pump-for-Perkins-4

1.Clean the mating surfaces of the cylinder block and flange (5) on the fuel transfer pump.

Note: Ensure that the camshaft lobe for the fuel transfer pump is at minimum lift before the fuel transfer pump is installed. The fuel transfer pump can be oriented in two positions. Ensure that the fuel transfer pump is oriented in the correct position.

2.Install a new O-ring seal (3) to fuel transfer pump (1).

3.Lubricate the operating plunger of fuel transfer pump (1) with clean engine oil.

4.Position fuel transfer pump (1) on the cylinder block. Ensure that the operating plunger is positioned correctly on the camshaft lobe. Install bolts (4). Tighten the bolts to a torque of 6 N·m (53 lb in).

5.Connect the hoses (not shown) to fuel transfer pump (1). Tighten the hose clamps.

Note: The inlet for the fuel transfer pump can be rotated 360 degrees by loosening bolt (2). The fuel inlet is adjustable in 15 degree increments. If adjustment is made to the position of the fuel inlet,tighten bolt (2) to a torque of 2.5 N·m (22 lb in).

6.Turn the fuel supply to the ON position.

7.Prime the fuel system. Refer to Systems Operation, Testing and Adjusting, “Fuel System -Prime” for additional information.

More Perkins EST,please refer to:Perkins Engine Trouble Repair

2022年2月1日星期二

How to Installation Mercedes Benz star diagnostic tool software

How to Installation Mercedes_Benz star diagnostic tool software

OS: Windows 10 Professional Edition 64 bit, The remaining space of the C drive is more than 300 G, and the memory is more than 4G. It is recommended to use an SSD hard disk。

1.Download the xentry IOS file and double-click it after decompression Star.exe

“Start” and select “Run as administrator”

How-to-Installation-Mercedes_Benz-star-diagnostic-tool-software-1

2.Then select the desired language and confirm installation of the following packages by clicking on “Install”:

How-to-Installation-Mercedes_Benz-star-diagnostic-tool-software-2

3.The InstallShield Wizard opens. Click “Next” to go to the general terms and conditions. Please accept them and click on “Next”:

How-to-Installation-Mercedes_Benz-star-diagnostic-tool-software-3

4.Destination folder: Confirm the predefined destination directory for XENTRY Diagnosis or enter a folder of your choice (if possible, the suggested path should be retained):

How-to-Installation-Mercedes_Benz-star-diagnostic-tool-software-4

5.Then click on “Next” to go to the installation window. Installation: To install, click the button with the same name as soon as the assistant for the installation of the program is ready. The installation process takes some time:

How-to-Installation-Mercedes_Benz-star-diagnostic-tool-software-5

6.After a successful installation click “Finish” to confirm: Then restart the system.After restarting your computer, this Hardware Selection Window will open: You can operate Open Shell either with XENTRY Diagnosis VCI or SDconnect. Please select the corresponding field for the hardware you are using. Note: This window appears whenever you start ConfigAssist and after installing updates.

7.After selecting the hardware a welcome window will be displayed if you go onto the button „Configure”. Please click onto “Continue” in the lower right corner.

How-to-Installation-Mercedes_Benz-star-diagnostic-tool-software-7

8.In the next window you can see information about product updates. Now click on “Next” until you come to “Install StartKey”. The system automatically searches for the latest StartKey on the StartKey server via the Internet connection. The StartKey is stored on the system.

How-to-Installation-Mercedes_Benz-star-diagnostic-tool-software-8
How-to-Installation-Mercedes_Benz-star-diagnostic-tool-software-9
How-to-Installation-Mercedes_Benz-star-diagnostic-tool-software-10

9.If you are not a Mercedes-Benz dealer, you need to use a patch to use this software.

How-to-Installation-Mercedes_Benz-star-diagnostic-tool-software-11
How-to-Installation-Mercedes_Benz-star-diagnostic-tool-software-12
How-to-Installation-Mercedes_Benz-star-diagnostic-tool-software-13

Set connect C4 IP address

How-to-Installation-Mercedes_Benz-star-diagnostic-tool-software-14

10.If you use C6 connection, VCI is required when registering, and use USB or WIFI to connect to the computer.